Installation Guide
A. HID kit installations start with preparation. You have to make sure the vehicle is off the battery is disconnected, and the engine is cooled down. This is will ensure your safety. Now we can move to the actual installation. If you have a single low beam kit, locate your low beam dust cover on the back of your headlight assembly. Remove the cover by twisting it counter clock wise. This should unscrew the dust cover giving you access to the bulb. Make sure you unplug the bulb from the wiring harness before you attempt to remove it. Now you can continue to place the xenon bulb in place of the halogen bulb you just removed, just make sure you don’t touch the glass part of the bulb.
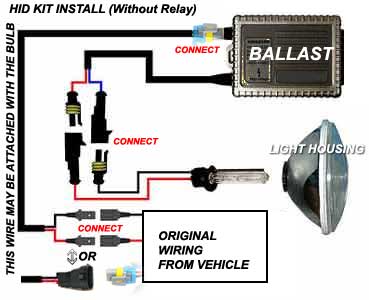
B.: Installing the ballast. First thing is to find a good location to place the ballast, somewhere close enough to able to reach the bulb with the wiring plugs. Once you have the ballast secured then you can proceed to plug the wiring to the bulb, and plug the old harness to the ballast.
C.: In HID kit installation is to double check all the wiring plugs to make sure everything snapped into place correctly. Also double check to make sure that the ballast is securely attached to the vehicle. Now you can reconnect your battery and test out your new HID upgrade.
Video Installation
Watch the below installation video done on a Jeep. Your vehicle will be similar: Please note the procedure does not require you to remove the front bumper on most vehicles, as the ballast can be installed right behind the headlight aread on an existing bolt. Some vehicles may require the headlight to move removed because of tight space behind the headlight. Usually 90% of vehicles you can install an HID kit within 30 minutes.
Installation on a 2006 Audi A3 (Below)
Common Problems
My Kit Installed doesn’t turn on!
Sometimes the connector you insert into the ballast must be reversed!. Some cars wiring is reverse polarity, so you may need to switch the polarity and that fixes the problem 99% of the time. Some vehicles simply require problem eliminators to solve “not turning on” or “Flickering effect”.
I think my ballast or bulb is defective? Watch below
I start my car with the HID kit turned on and one or both of the lights turn off.
The lack of power and pulsing voltage when your starter is cranking may activate the safety circuit in the ballast and turn one or both off to protect its self.
Solution: a: Start car with headlights turned off.
b: Install a wire relay harness.
What do I do with the rubber grommet pre-installed on the wires?
Common Problems Low/High Beam Opposite:
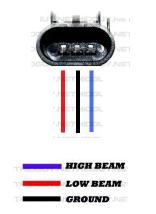
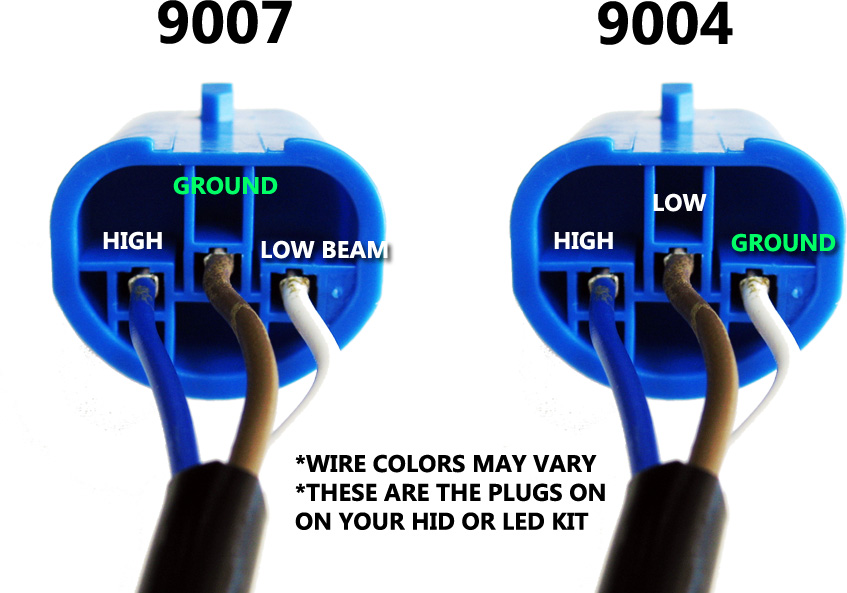
If your halogen high beam turns on for your low beam on 9007. Or if on your 9004 vehicle your lights seem to be acting wrong: This is a common problem associated with polarity from the HID kits connector. Each vehicle manufactures uses a different configuration for (Ground / Low Beam / High Beam). You can easily swap the pins on the hid connector. Here is how you do it. Stick your finger inside the plug where the pins are and bend them down toward the CURVED surface of the plug. Then raise them up a bit and pull from the back. This is the easiest way to swap the pins.
Making Connections to your vehicles wiring
Please look at the procedure below in installing an HID kit on various bulb types.
H1 HID Bulb Size Installation
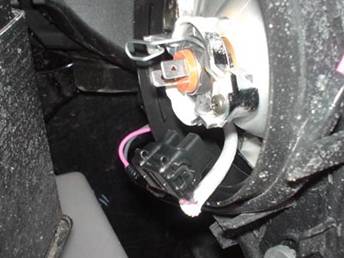
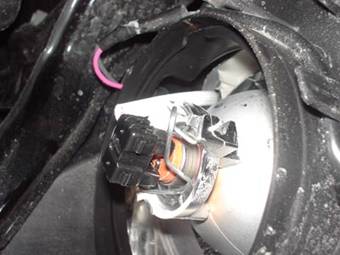
1. Get access behind the headlight or remove your headlight and remove the H1 bulb as shown below:

2. Installation the replacement HID H1 bulb without damaging it or touching the glass with your fingers.
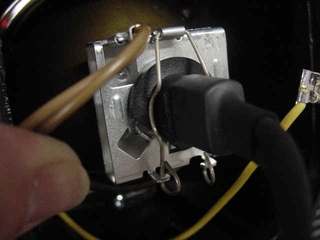
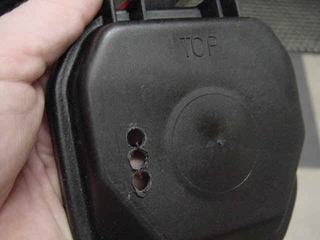
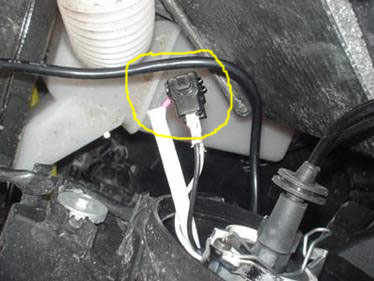
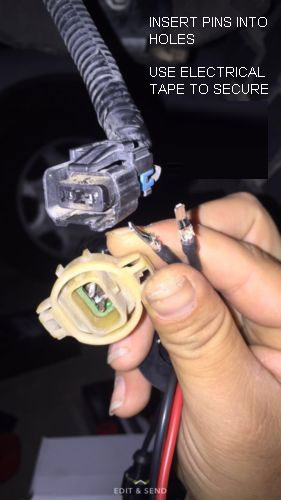
3. Attach the yellow and brown wires shown in our pictures to the HID kit wire supplied. The HID kit wires are males and the original cars connectors (usually yellow/brown) are females.. You are getting power from these exisiting Drill holes for the wire of the bulb to be ran outside if your headlight had a cover. Run the wires through the new holes you drilled and use the supplied rubber garmet if neccessary.
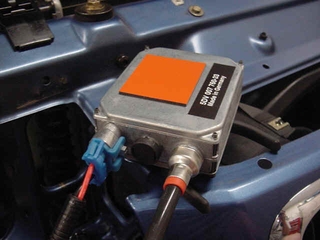
4. Connect the wires from the bulb and from the cars original wiring to the ballast. Mount the ballast in a sercure location by either zip-tie, double back tape, or screw.
See this video for example HID installation for H1: https://www.youtube.com/watch?v=_6roNTnSuF8
See this video for example HID installation on fog lights for H3: https://www.youtube.com/watch?v=Exhh9Wvrpdg
H7 HID Bulb Size Installation
1. Get access to your bulb by removing parts or covers. Each car is different, please consult your owners manual for getting access to the bulb. Disconnect the original vehicle’s connector that is attached to the bulb and carefully REMOVE the bulb.
2. Drill hole in the cover if one exists for your vehicle to run the HID wires. 1 set of wires runs for the bulb connection and 1 to get power from the cars original wiring plug. You simply have to stick in the terminal connectors into the cars original connector or plug in the H7 connector shown below if supplied. Install your new HID bulb carefully without touching the glass. Run the wires from the location where you will mount the ballasts to the bulb area. Make connection
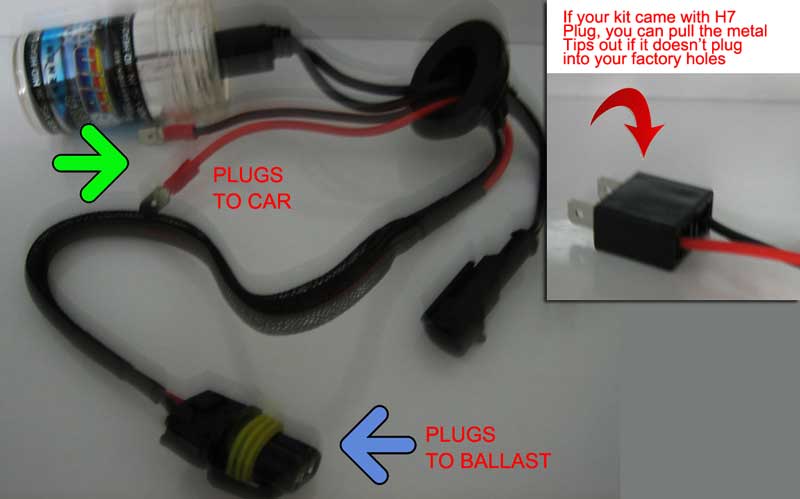
3. Mount your ballast in a secure place and make sure the connections are tight. You can use zip-tie, double back tape or screws.
H4 HID Bulb Size Installation
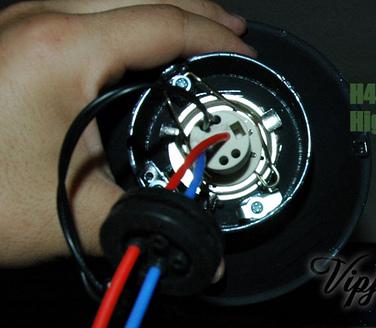
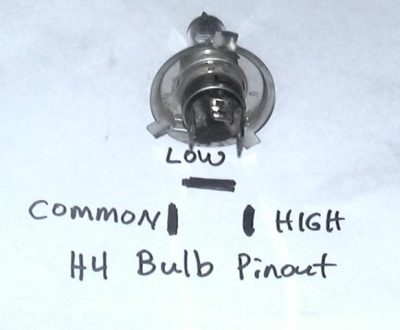
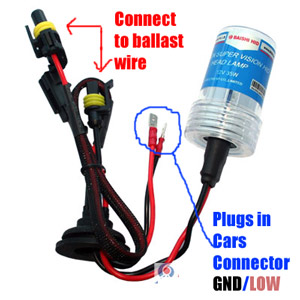
1. Get access behind the headlight or remove your headlight and remove the H4 bulb as shown below. Install the HID bulb supplied without touching the glass. If you do you must remove with alcohol.
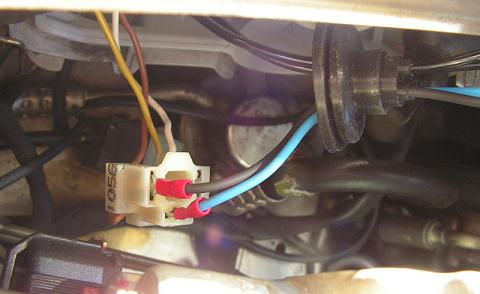
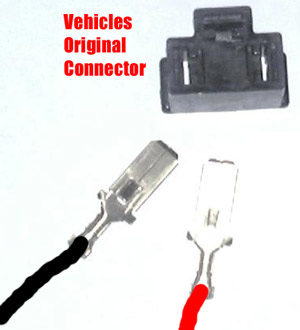
2. Mount the ballast in a good location. Run any wires through any covers, if any, of your headlights. Connect the bulb wires labeled above to the ballast wires. Connect the dangling red/black wires to your cars appropiate terminal, as shown above.
H13 HID Kit Installation
1. Remove stock bulb
2. Insert HID bulb carefully
3. Plug HID bulb to ballast
4. Ballast has two connectectors, positive and negative, connect these into your stock H13 connector.
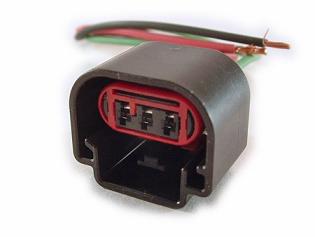
Stick the terminals from the ballast into your original connector above.
H13 HID Installation


H16 / 5202 HID Installation
See Video Here: https://www.youtube.com/watch?v=mXQ0O_RvQ80
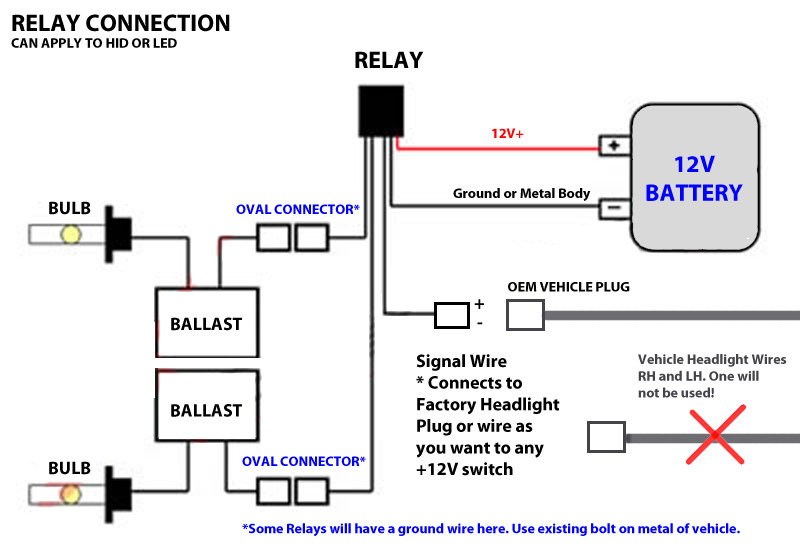
Relay Harness Installation
If you purchased our relay harness, the below diagram shows the basic hookup. As you can see the relay gets the power from the battery and uses 1 side of the cars bulb connector. The other side factory bulb connector will not be used for anything.
Watch the video below on relay installation:
Relay Harness Installation with H13, 9004, 9007, H4 Type Bulbs with Halogen High Beam
Since these type of dual beam kits we offer include a halogen high beam bulb, installing a relay on these kits requires you to wire the high beam halogen, otherwise it will not work. This is very easily done.
Please click here for installation
instruction download in PDF format
(adobe PDF reader required)
50W Resistor Installation on existing wiring to act like a bulb
Disabling Daytime running lights
Some vehicles will come from factory with Daytime running lights. There are 3 types of daytime running lights:
- 1. Daytime running lights using your exisiting low beam or high beam bulb
- 2. Day time running lights using your existing low beam or high beam bulb at 50% power level
- 3. Day time running lights using a 3rd bulb in your headlight, not related with the low or high beam
Most vehicles outside the USA (All of Canada) have daytime running lights. Its important to know where your daytime running lights are running from. If you install an HID kit on #2 with 50% power level your HID will not operate correctly and cause flickering.
We recommend if you can, disable your daytime running lights if they are on the bulb your going to convert to HID. You may need to install our standard relay if disabling is not an option and you have flashing problems.
You can find information on disabling daytime running lights here: http://www.lightsout.org/disable.html
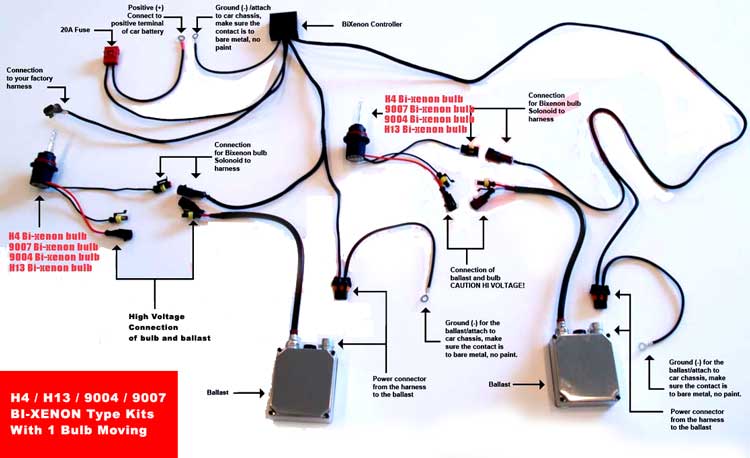
Bi-xenon Installation Diagram
If install bi-xenon kits with bulb type 9004 and 9007 please click here download the guide
LED Polarity
HID Ballast Radio Interference
Some vehicles may experience noise in their radio when installing aftermarket HID lighting with ballasts.


